

How to Install Wood Effect Tiles
Wood-effect tiles have exploded in popularity — and for good reason. They combine the warmth and natural beauty of hardwood with the durability, waterproofing and easy maintenance of porcelain. Whether you're renovating a bathroom, hallway, or open-plan living space, wood-look tiles deliver a timeless designer finish.
In this complete guide, we’ll cover:
- The best wood-effect tile laying patterns
- Installation tips for a flat, long-lasting finish
- Grouting and cleaning advice
- Photos of each pattern to help you choose your style
⭐ Popular Laying Patterns for Wood Effect Tiles
Choosing the right pattern is key — it changes the entire character of your room.
🔹 1. Staggered / Random Bond

The most traditional and most popular way to lay wood effect tiles. Joints are staggered randomly, but never more than 33% offset to avoid lippage.
Why choose it:
✔ Natural timber look
✔ Works in any room size
✔ Easy to install
🔹 2. Regular / Straight Bond

Tiles are aligned perfectly straight with consistent joints — ideal for modern interiors.
Why choose it:
✔ Clean, contemporary finish
✔ Great for bathrooms & wet rooms
🔹 3. Crosshatch Pattern

A woven-style layout where tiles alternate direction in groups, creating a subtle but striking effect.
Why choose it:
✔ Decorative & unique
✔ Best with rectified tiles
🔹 4. Herringbone
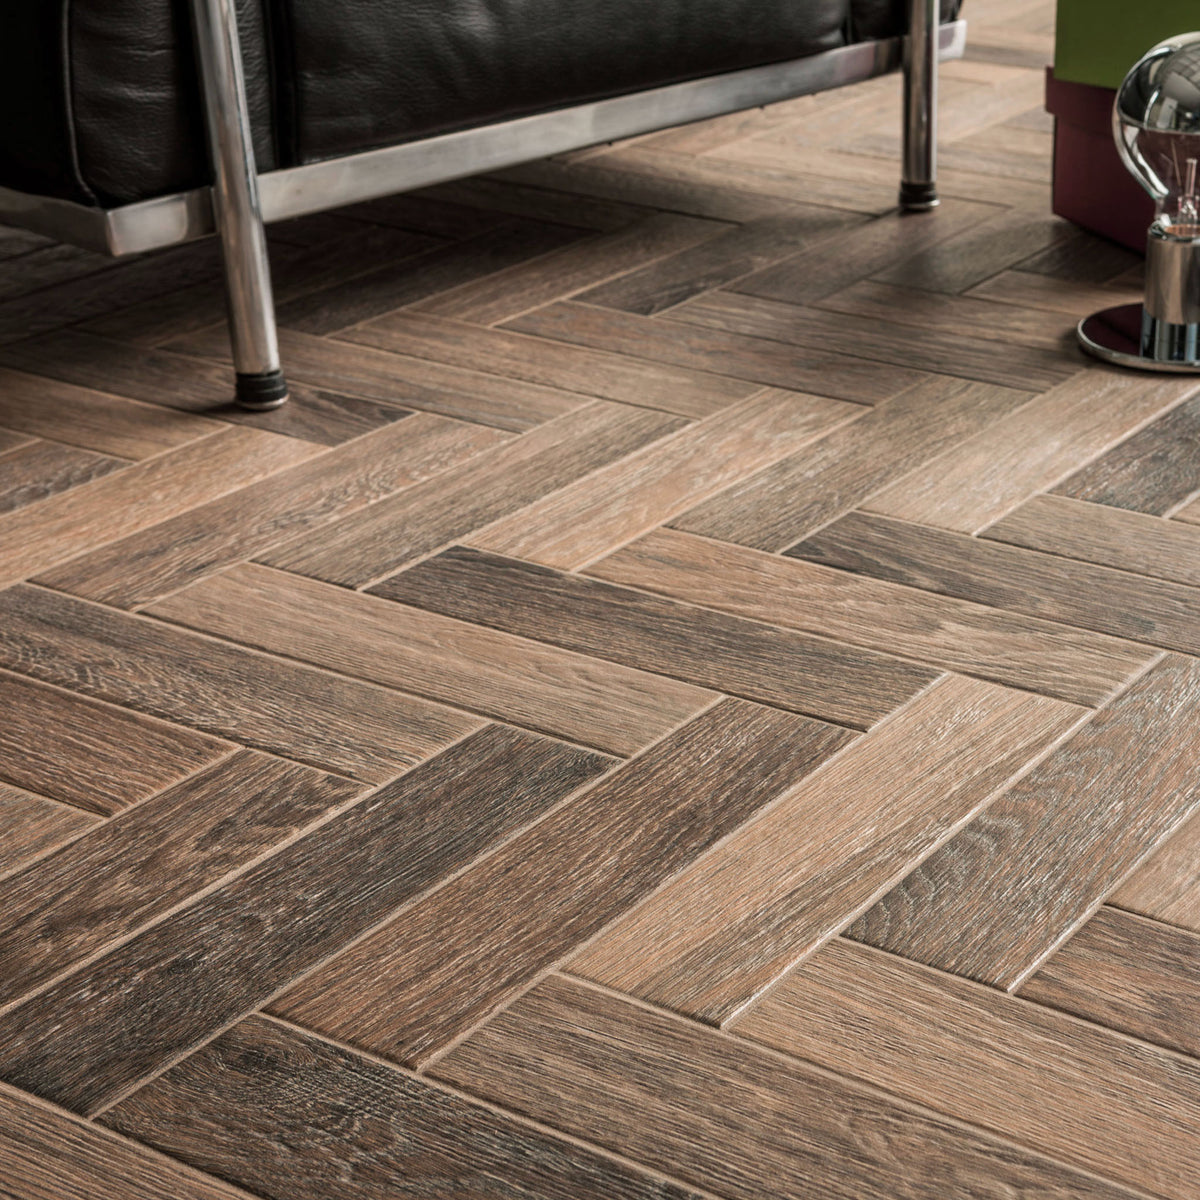
A classic zig-zag pattern that adds movement and elegance.
Why choose it:
✔ Timeless design
✔ Perfect for hallways or feature areas
✔ Works well with narrow planks
🔹 5. Chevron

Similar to herringbone but with angled ends that form perfect V shapes.
Why choose it:
✔ High-end, luxury look
✔ Great for modern or classic interiors
🔹 6. Parquet Tiles
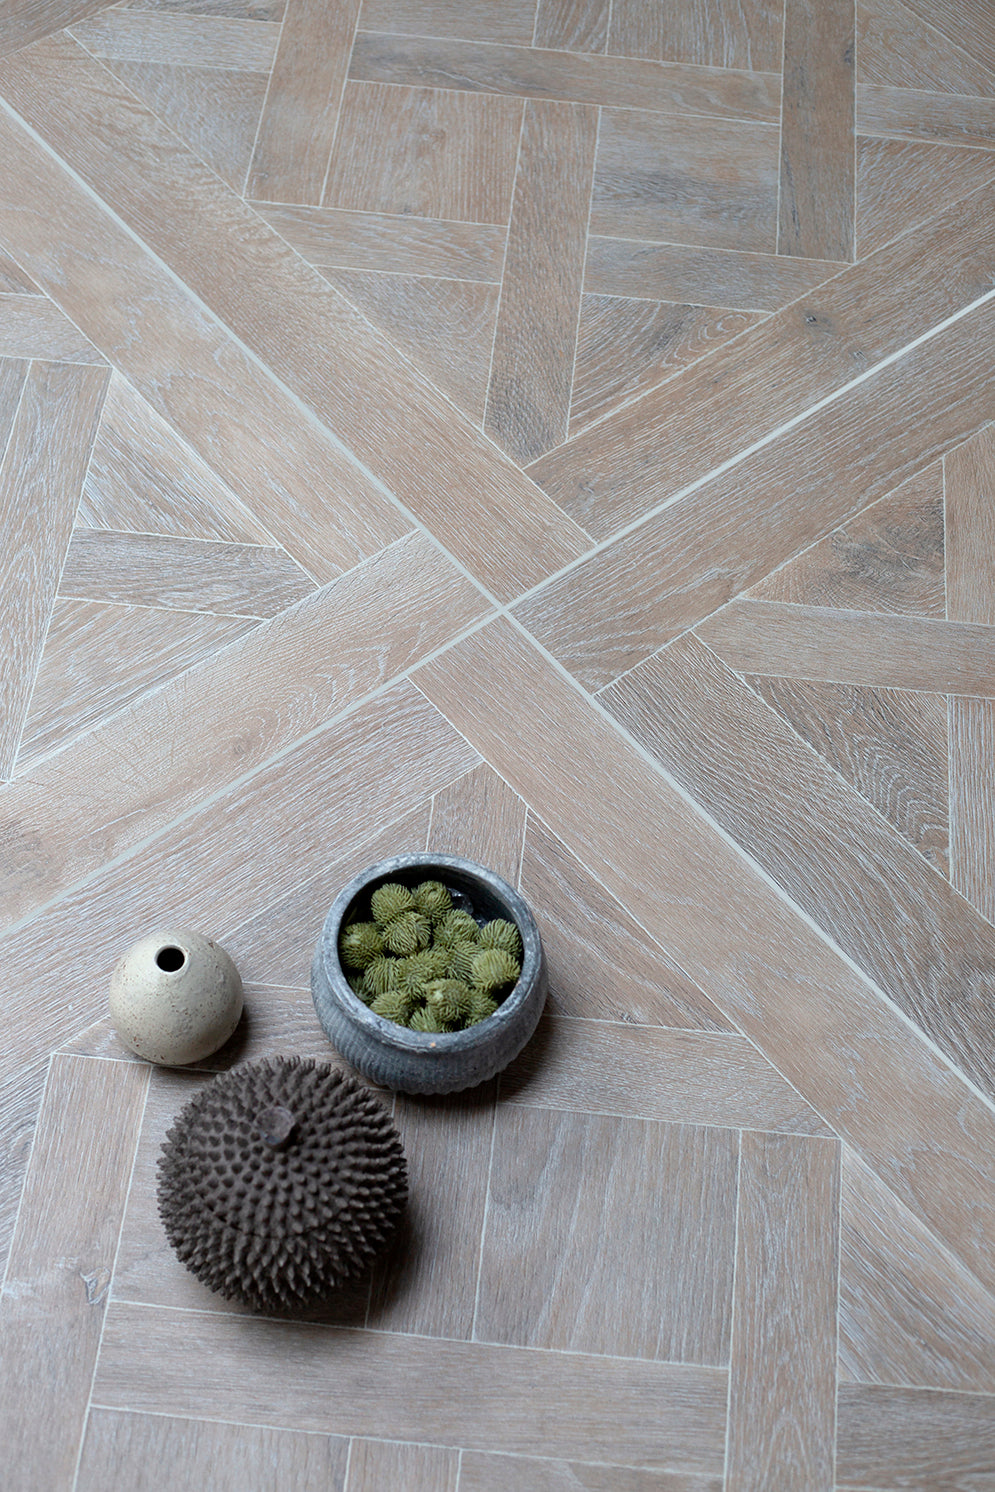
Large square porcelain tiles printed with parquet design create a stunning, geometric floor with minimal fitting time.
Why choose it:
✔ Luxurious and dramatic
✔ Easier and cheaper than real parquet
✔ Ideal for living rooms and feature spaces
🛠 How to Install Wood Effect Tiles (Step-by-Step)
Wood-look tiles are usually porcelain, so the installation process is very similar to other porcelain floor tiles. But long plank tiles need a little extra planning.
1. Plan Your Floor Layout
Before you start, map your layout carefully — especially for herringbone or chevron.
Tips:
- Avoid thin slither cuts against walls
- Draw the room to scale on graph paper
- Dry-lay a few tiles to visualise patterns
Good planning = professional result.
2. Order Enough Tiles
Plank tiles require more cuts and create more offcuts.
- Add 10% extra for simple layouts
- Add 15–20% for herringbone, chevron, crosshatch or awkward rooms
It’s always better to over-order than to wait for more stock.
3. Prepare the Subfloor Properly
A level subfloor is essential.
Check for:
- Dips or high points
- Cracked or loose flooring
- Moisture issues
Use a self-levelling compound if needed — long planks reveal unevenness more than square tiles.
4. Watch for Tile Bowing
Long planks may have a slight natural curve due to kiln firing. This is normal.
But combined with staggered patterns, bowing can create lippage (one edge higher than the next).
Solution:
✔ Always use a tile levelling system
✔ Avoid 50% offset patterns
✔ Use a 1/3 stagger or a pattern suited to plank tiles
You'll achieve a perfectly flat, even finish.
⚙️ Grouting Wood Effect Tiles
Grout dramatically affects the final look.
Choosing a grout colour
Most people choose matched grout tones to create a seamless, real-wood effect.
But bolder grout colours can highlight the pattern for a modern, high-contrast finish.
Grout width
- Rectified tiles: 2–3 mm
- Non-rectified: 3–5 mm
🧼 Cleaning and Maintenance
Unlike real wood, wood effect porcelain tiles are:
- Waterproof
- Stain resistant
- Scratch resistant
- Easy to clean
Daily cleaning:
- Sweep with a soft brush
- Mop with warm water and a gentle cleaner
Important:
Clean tiles thoroughly during installation and after grouting. Residue left on the surface can dry into a fine film that attracts dirt